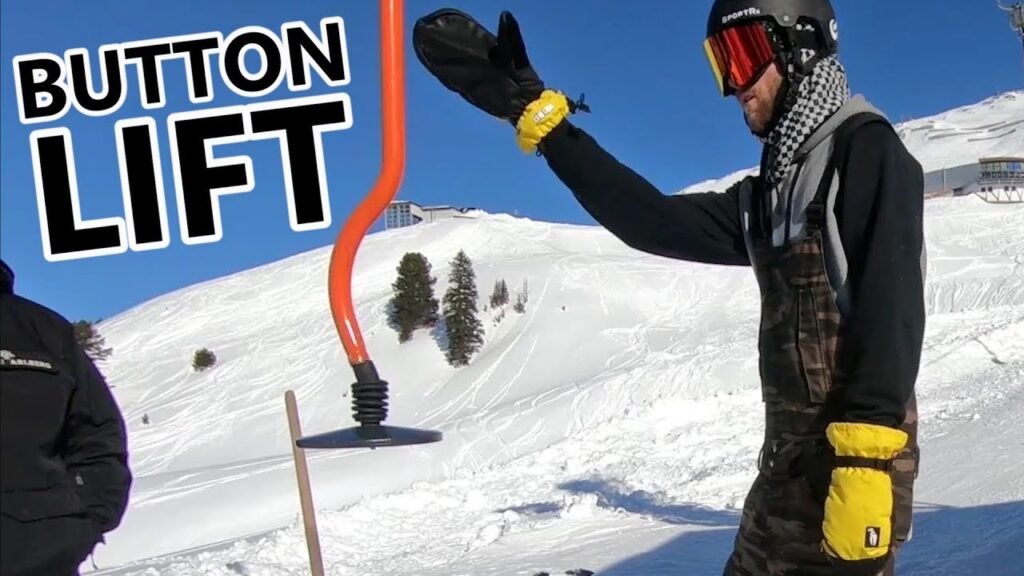
How To Ride A Button Lift – Beginner Snowboard Tutorial
In the “How To Ride A Button Lift – Beginner Snowboard Tutorial” video by SnowboardProCamp, the narrator provides helpful tips for riding a button lift on a snowboard. Filmed in St Anton, Austria, specifically in the St Anton terrain park, the video focuses on mastering this common type of lift for short beginner runs and park laps. Before attempting a button lift, the video stresses the importance of practicing one foot skating, as this skill will come in handy for quickly maneuvering onto the lift. The tutorial then guides viewers on how to properly grab the button lift, emphasizing the need to pull it around the front leg and squeeze it between the thighs. The narrator also highlights the unique feeling of riding up on a button lift, with the back foot positioned close to the front binding. Additionally, the video mentions the curved shape of the button lift, which can be utilized to hook around the front leg depending on the rider’s stance, making the experience more comfortable. Concluding with the narrator’s opinion that the button lift is easier compared to the t-bar or rope-toe, the video encourages beginners to give it a try and offers a playlist for more beginner snowboard tips.
How To Ride A Button Lift – Beginner Snowboard Tutorial

Preparation for Riding a Button Lift
Before attempting to ride a button lift on your snowboard, it is important to practice a lot of one foot skating. This will help you build balance and coordination, which are essential skills for successfully riding a button lift. Practice skating around on your board with just one foot, getting comfortable with the movement and balance required.
Positioning Yourself for the Button Lift
When approaching a button lift, it is crucial to quickly position yourself for it. The button lift moves around quickly, so you need to be ready to walk up to the position as soon as possible. Skating with one foot will help you be prepared to move swiftly and get into position swiftly.
Grabbing the Button Lift
Grabbing the button lift is different from any other type of lift. You need to take the small button and put it in between your legs, squeezing it tightly with your thighs. This may feel a bit strange at first, but it is the key to securely holding onto the lift. The button is small, so squeezing it between your thighs ensures that it stays in place. Additionally, you will notice that your back foot is close to your front binding, which is a unique feeling when riding up the lift.
Squeezing the Button Lift
To effectively ride a button lift, it is essential to maintain a strong grip on the lift. Squeezing the button lift tightly between your thighs will help ensure it stays secure as you ascend the run. Maintaining this grip will prevent any accidental slips or disengagement from the lift.
Adjusting Your Foot Position
As you ride the button lift, you may need to adjust your foot position. The small size of the lift requires you to have your back foot close to your front binding. This foot placement is different from riding other types of lifts. Be conscious of your foot position and make any necessary adjustments to maintain balance and stability throughout the ride.
Taking Advantage of the Curve in the Button Lift
A unique feature of some button lifts is the curve in the lift itself. Depending on whether you ride regular or goofy footed, you can get the lift to hook around your front leg in a way that is more comfortable for you. Experiment with the lift’s curve and find a positioning that aligns with your preference and adds to your comfort while riding.
Comparing the Button Lift to Other Types of Lifts
The button lift is a common type of lift for short beginner runs and park laps. While it may take some time to get used to, many riders find it easier than other types of lifts, such as the t-bar or rope-toe. The small size of the button lift and the ability to squeeze it securely between your thighs contribute to its ease of use. Comparatively, other lifts may require different techniques and balance adjustments.
Tips for Success with the Button Lift
- Practice one foot skating to build balance and coordination.
- Be ready to quickly position yourself for the lift.
- Securely grab the button lift by squeezing it between your thighs.
- Adjust your foot position to maintain balance and stability.
- Take advantage of the curve in the lift for added comfort.
- Experiment with different techniques to find what works best for you.
Common Mistakes to Avoid
- Neglecting to practice one foot skating before attempting the button lift.
- Failing to quickly position yourself for the lift.
- Not squeezing the button lift tightly between your thighs, leading to slips or disengagement from the lift.
- Forgetting to adjust foot position for balance and stability.
- Ignoring the curve in the lift that can provide added comfort.
FAQs and Additional Resources
For more beginner snowboard tips, check out the beginner snowboard playlist. If you have any specific questions about riding a button lift or any other aspect of snowboarding, be sure to leave them in the comments section of the video.
